



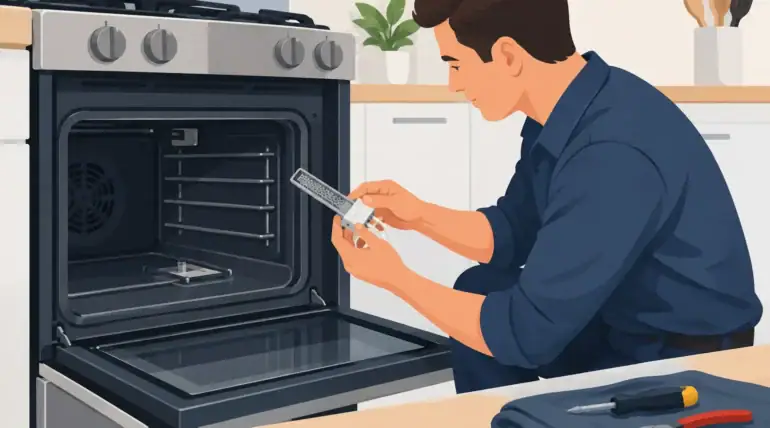
A gas oven that takes forever to heat can turn an ordinary dinner into a guessing game. Learning how to replace oven igniter can help when the igniter is the confirmed problem, but this repair involves gas, electricity, sharp metal panels, and parts that must match your oven exactly. A careful approach matters.
A failing igniter is a common reason a gas oven will not heat, heats slowly, or glows without lighting the burner. Still, the igniter is not the only possible cause. A bad safety valve, burner problem, control board issue, or wiring fault can produce similar symptoms. Before ordering a part or taking panels apart, take a moment to narrow down what is happening.
Signs Your Oven Igniter May Need Replacement
Most modern gas ovens use a hot-surface igniter. When you select Bake, the igniter receives power and begins to glow bright orange. As it heats, it draws enough electrical current to open the oven’s gas safety valve. Gas flows to the burner, and the burner lights.
The key detail is that a glowing igniter is not automatically a good igniter. It can glow and still be too weak to draw the current needed to open the safety valve.
Common signs include an oven that does not heat at all, an oven that takes more than a few minutes to ignite, a burner that lights only after several attempts, or a gas smell that appears because ignition is delayed. You may also see the igniter glowing for a long time while the burner remains unlit.
If you smell gas, stop immediately. Turn the oven off, avoid flames and electrical switches, ventilate the area if it is safe to do so, and contact your gas utility or a qualified appliance technician. Do not continue troubleshooting or try to light the burner manually.
Before You Replace an Oven Igniter
Start by confirming your oven uses a replaceable hot-surface igniter. This guidance applies primarily to gas ranges and wall ovens. Electric ovens use heating elements, not gas igniters, and the diagnosis is different.
Find the model number before buying anything. It is commonly located around the oven door frame, behind the storage drawer, on the side of the oven cavity, or on the appliance’s back panel. Igniters can look nearly identical while having different mounting brackets, wire connectors, lengths, and electrical ratings. Installing a universal part may work in some cases, but an exact manufacturer-approved match is generally the safer choice.
You will usually need a screwdriver or nut driver, needle-nose pliers, a flashlight, work gloves, and the correct replacement igniter. Depending on the model, you may also need a socket set. Keep a small container nearby for screws so they do not disappear beneath the range.
If your oven is still under warranty, if the wiring is damaged, or if access requires disconnecting a complicated gas line, schedule service instead. The cost of a professional repair can be less than the cost of correcting an incorrect installation or replacing a damaged valve.
How to Replace Oven Igniter Step by Step
1. Shut off power and gas
Turn the oven controls off. Unplug the range from the wall outlet or switch off the correct circuit breaker. Do not rely on turning the control knob to Off because the igniter circuit can still be energized.
For added safety, close the gas shutoff valve behind the range if you can access it without moving the appliance excessively. The valve handle should be perpendicular to the gas pipe when closed. If you need to pull the range out, move it carefully and avoid straining the flexible gas connector.
2. Access the bake burner assembly
Open the oven door and remove the racks. Most ovens have a bottom panel that lifts out after removing a few screws. Under that panel is often a flame spreader or burner cover. Remove the screws holding it in place and set the hardware aside in order.
You should now see the bake burner tube. The igniter is typically mounted beside or on the burner near the rear of the oven. It may be a flat, rectangular piece or a narrow rounded component secured with one or two screws.
Take a clear photo before disconnecting anything. It gives you a reliable reference for wire routing and mounting position.
3. Remove the old igniter carefully
Remove the screws holding the igniter to the burner. The old igniter may be brittle, especially if it has failed after years of heating and cooling, so do not twist or force it.
Follow the igniter wires to their connector. On some models, the connector is accessible inside the oven cavity. On others, the wires pass through the back wall and connect behind a rear panel or through the storage drawer area. Disconnect the plug gently. If your model uses wire nuts rather than a plug, note exactly how the original wires are connected before removing them.
Do not cut wires unless the replacement part instructions specifically require it and you are comfortable making high-temperature appliance wire connections. Ordinary household wire connectors are not appropriate inside an oven’s heated area.
4. Install the replacement igniter
Handle the new igniter by its ceramic base and mounting bracket. Avoid touching the heating surface with bare fingers when possible. Oils and residue can shorten the life of some igniter styles.
Mount the new igniter in the same orientation as the original, using the correct screws. It must sit securely in the burner position without touching the burner tube or surrounding metal. Route wires along the original path and reconnect the plug or approved high-temperature connections.
Before reinstalling covers, inspect the wiring. Keep it away from hot burner surfaces, moving drawer tracks, and sharp panel edges. Pinched wires can create a dangerous short or cause another no-heat problem.
5. Reassemble and test the oven
Reinstall the burner cover, oven bottom panel, racks, and any rear or drawer panels you removed. Restore the gas supply, then restore electrical power.
Set the oven to Bake and watch through the oven door or window. The igniter should begin glowing, followed by a steady flame along the bake burner within a short time. Let the oven preheat, then confirm it reaches and holds the selected temperature.
A brief initial gas odor can occur as the burner lights, but a persistent gas smell, delayed ignition, popping, or uneven flame is not normal. Turn the oven off and arrange a professional inspection.
When a New Igniter Does Not Solve the Problem
A new igniter that still will not light the burner points to a different issue or an installation problem. Check that the connector is fully seated and that the circuit breaker has not tripped. If those basics are correct, the cause may be the oven safety valve, electronic control, wiring harness, thermostat sensor, or burner itself.
This is where testing matters. A technician can measure igniter amperage, check voltage at the igniter circuit, inspect the gas valve, and verify whether the control is sending the correct signal. Replacing parts by guesswork can become expensive quickly, particularly on newer ranges with electronic controls.
Commercial kitchens should be especially cautious. An oven that lights inconsistently can disrupt service and create a safety concern for staff. Fast diagnosis is usually more valuable than repeated part replacements and downtime.
A Safer Choice When You Are Not Sure
Replacing an oven igniter is manageable for some homeowners with the correct part, clear access, and basic repair experience. It is not the right DIY project when there is a gas odor, damaged wiring, uncertain diagnosis, or any concern about reconnecting the appliance safely.
For homeowners and businesses in Cincinnati, Columbus, Dayton, Indianapolis, and Louisville, Smart Appliance Repair can diagnose gas oven heating problems, explain the repair before work begins, and help restore dependable cooking without the uncertainty of trial and error. A properly repaired oven should light promptly, heat evenly, and let you get back to meals and service with confidence.